How to Connect a Radiator | Complete Piping Guide
17. 4. 2025
A Complete Guide to Successful Radiator Installation
Correctly connecting a radiator is essential for ensuring the efficiency, safety, and longevity of your heating system. Whether you're installing a new unit or replacing an old one, understanding the principles behind radiator connections will help you achieve optimal results.
Types of Radiator Connections
There are several standard ways to connect a radiator to the heating system. Each method has its own advantages and is suitable for different layouts or renovation projects.
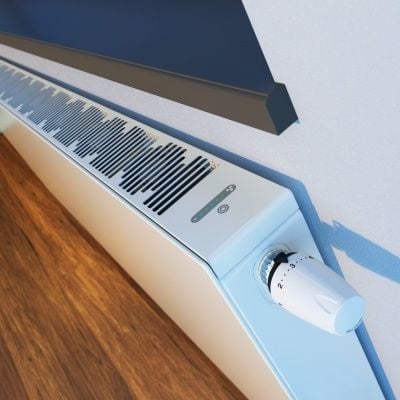
Bottom Connection (Underneath Piping)
Bottom connection radiators are now the most commonly used in modern heating systems. This connection type is especially popular for its clean appearance and space-saving practicality.
Advantages of bottom-connected radiators:
- Elegant design with hidden piping
- Easier cleaning around the unit
- Maximized wall space above the radiator
- Full compatibility with modern valves and thermostatic heads
Radiator Piping Schemes Used in Homes
Choosing the right connection method impacts not only performance but also efficiency and ease of use. Here are the most common layouts:
1. Single-Side Bottom Connection
Modern radiators – such as KORADO's popular ventil compact models – are often built for a configuration where both flow and return pipes are connected underneath on the same side.

2. Side Connection
Side piping is a traditional radiator connection method, frequently used in older systems or where alternatives are impractical. Hot water enters through the upper pipe, while cooler water returns via the lower pipe on the same side.

3. Diagonal Side Connection
This layout brings hot water in from the upper corner on one side and returns it from the lower corner on the opposite side. It promotes even heat distribution and efficient circulation.

4. Single-Point Connection
Often used with older cast-iron radiators or some towel rail models, both flow and return pipes enter the radiator at the same point. This compact solution is ideal for retrofits.

Step-by-Step: How to Pipe Up a Radiator by KORADO
KORADO radiators are among the most widely used in Europe. Below is a simplified process for correct radiator installation:
What You’ll Need:
- Radiator valves (according to the model)
- Quality sealing gaskets
- Bleed valve
- Plug for unused openings
- Thermostatic head
- Proper tools and spanners
Radiator Installation Process:
- Prepare the wall – measure and mark the location for the radiator
- Mount brackets – drill and fix based on radiator type and wall structure
- Prepare pipework – run the pipes to the connection points
- Install valves – mount thermostatic and lockshield valves as needed
- Hang the radiator – securely fix it to the wall brackets
- Connect pipework – use fittings to link the radiator to flow/return pipes
- Fit thermostatic head – once the system is filled and checked for leaks
Advanced Option: RADIK VKM8 with Variable Bottom Centre Connection
The RADIK VKM8 radiator features a central bottom connection and integrates advanced functionality:
Key benefits:
- Stylish clean lines with no visible piping
- Integrated 8-setting thermostatic valve for precise control
- High heat output with compact dimensions
Always follow manufacturer installation guidelines when connecting specialty models to ensure full performance and lifespan.
Common Radiator Connection Issues and How to Fix Them
Leaks
Always check all joints and use high-quality sealing materials. Make sure all fittings are properly tightened to prevent water damage.
Insufficient Radiator Output
This can be caused by incorrect connection (reversed flow and return), air trapped inside the radiator, or blockages. Ensure correct piping and bleed the radiator to restore performance.
Noisy Radiators
Gurgling or knocking sounds often result from air pockets in the system or an incorrectly sized circulation pump. Bleed the radiator and have a professional check pump settings if the issue persists.
Tips for Efficient Radiator Connections
- Always follow the manufacturer’s or designer’s recommended connection scheme
- Use high-quality fittings and valves – saving on cheap components may cost more later
- Don’t forget drainage options – install drain valves in accessible spots
- Insulate pipework to reduce energy losses and improve efficiency
- Respect flow direction – arrows on valves and fittings indicate proper water movement
Why You Should Hire a Professional Installer
Although this article covers the basic principles of radiator connections, we strongly recommend that any radiator or heating system installation be carried out by qualified professionals. DIY mistakes can lead to:
- Water leaks and costly interior damage
- Poor heating performance and uneven temperature distribution
- Excess noise or operating discomfort
- Increased energy consumption due to inefficiencies
- Shortened system lifespan
- Potential safety hazards
Professional installers not only have the theoretical knowledge, but also the hands-on experience and specialized tools needed to guarantee a secure and efficient installation. They can also provide a warranty on the work performed, giving you peace of mind.
Whether you’re working with bottom-connected radiators, side-piped units, or any other type, proper radiator connection requires precision, expertise, and compliance with proven methods. While this guide is intended to help you understand the process, the actual installation should always be entrusted to certified professionals. A correctly connected radiator ensures not only maximum home comfort, but also long-term energy savings and system reliability.